Add a Network Scanner to Epson Scan 2 (Windows and macOS)
Applies To
Operating Systems: Windows, macOS
Hardware: Epson network/Wi-Fi scanners and multifunction printers. This article does not apply to USB-connected scanners, which are added to Epson Scan 2 automatically.
Software: Epson Scan 2
-
Related Articles:
Description
This article explains how to install Epson Scan 2 and add an Epson scanner that is already connected to your network. It does not cover connecting the scanner to Wi-Fi or configuring network settings on the scanner itself.
Tip: If your scanner is connected via USB cable, it will be added to Epson Scan 2 automatically — the network-scanner steps below are only needed for scanners connected over the network.
Solution
Before you begin: Ensure the scanner or printer is already connected to the same network as your computer. If the device is not yet connected to Wi-Fi or Ethernet, complete the network setup first.
1. Install Epson Scan 2 (If Not Already Installed)
- Visit Epson Support.
- Enter your product's name or serial number.
- Select Drivers, then select and download Epson Scan 2.
- Open and run the downloaded installer, following any on-screen prompts.
2. Start Epson Scan 2
- Windows 11 / Windows 10: click Start, then select All Apps > EPSON > Epson Scan 2 > Epson Scan 2.
- Windows 8.1 / Windows 8: enter the application name in the search charm, then select the icon shown.
- Windows 7: click Start, then select All Programs or Programs > EPSON > Epson Scan 2 > Epson Scan 2.
- macOS: click Go > Applications > Epson Software > Epson Scan 2.
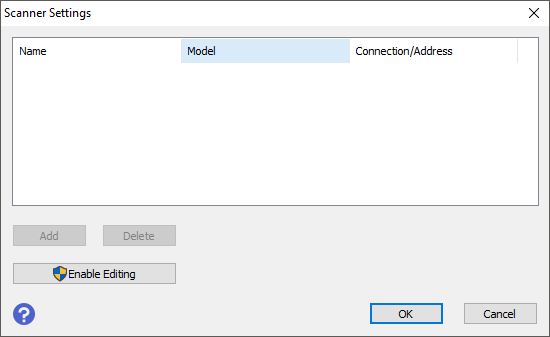
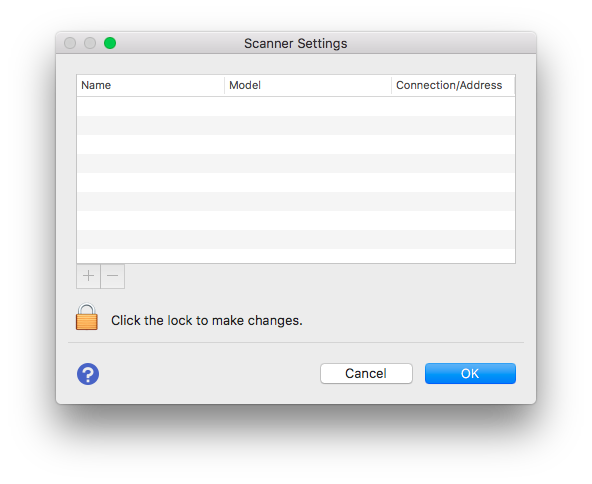
The Scanner Settings screen appears the first time you start Epson Scan 2. If the main Epson Scan 2 screen appears instead, select Settings from the Scanner menu to reach it.
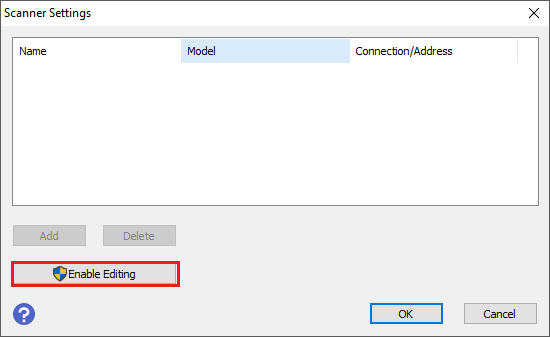
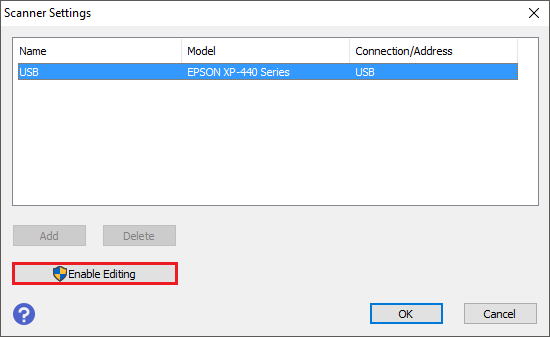
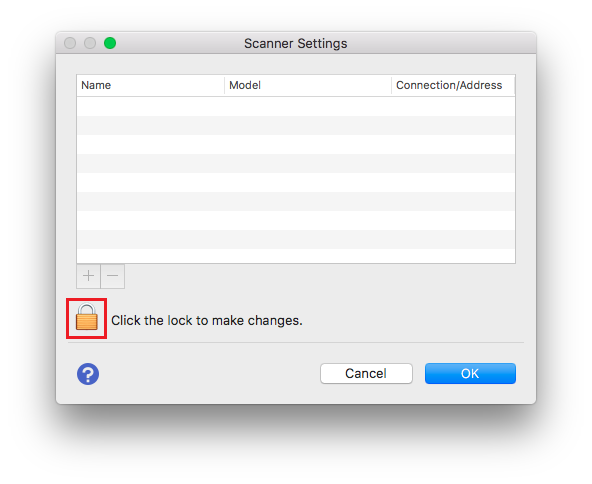
Note: If Add and Delete appear greyed out, click Enable Editing, and allow changes when prompted by User Account Control (Windows) or by entering an administrator username and password (macOS).
3. Add a Network Scanner
Select your operating system below and follow the steps for your situation.
Windows
If You Have No Scanners Installed (Windows)
-
Open Epson Scan 2 — you'll see the blank startup screen shown below.
-
Click Enable Editing to enable the Add button.
- Click Yes on the pop-up window.
-
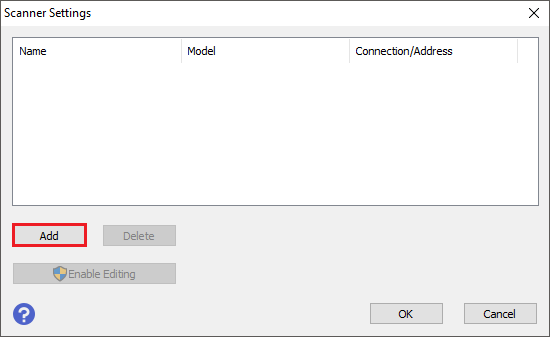
Click the Add button, then continue with "Add the Network Scanner (Windows)" below.
If You Already Have a Scanner Installed (Windows)
-
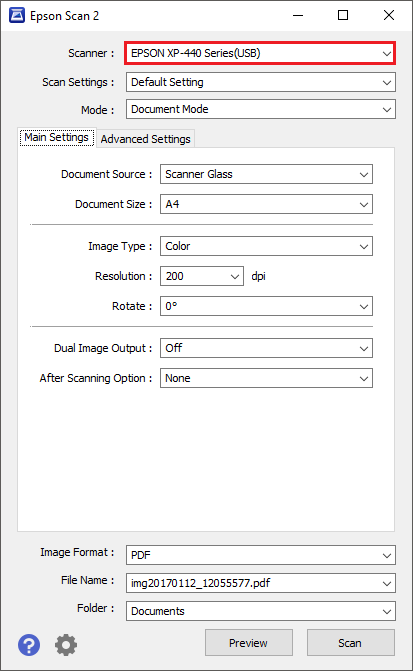
Click the Scanner drop-down menu.
-
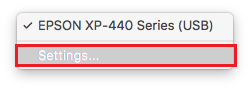
Select Settings.
-
Click Enable Editing to enable the Add button.
- Click Yes on the pop-up window.
-
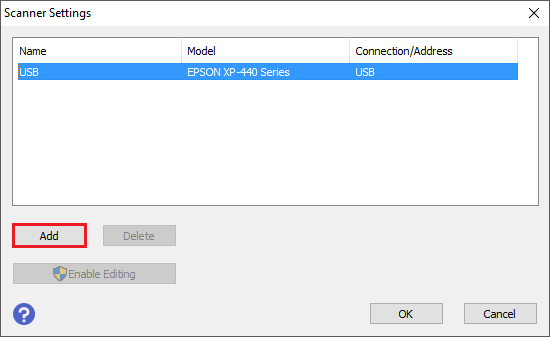
Click the Add button, then continue with "Add the Network Scanner (Windows)" below.
Add the Network Scanner (Windows)
-
Select the scanner you want to add from the Model list. Epson Scan 2 automatically starts searching your local network for the selected scanner.
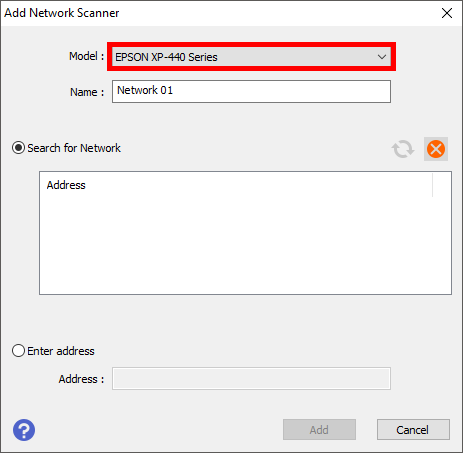
Note: You can rename the scanner by changing the text in the Name box.
-
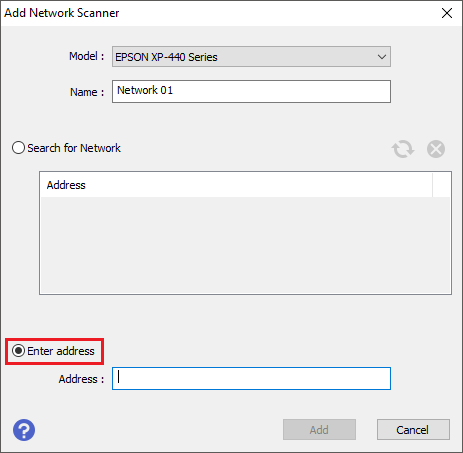
To add a scanner manually using its IP address instead, select Enter Address.
-
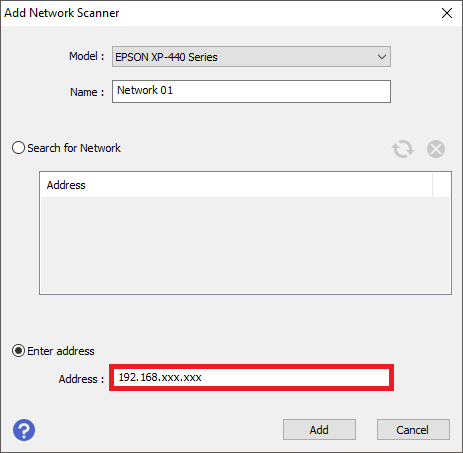
Type in the scanner's IP address, then click Add.
-
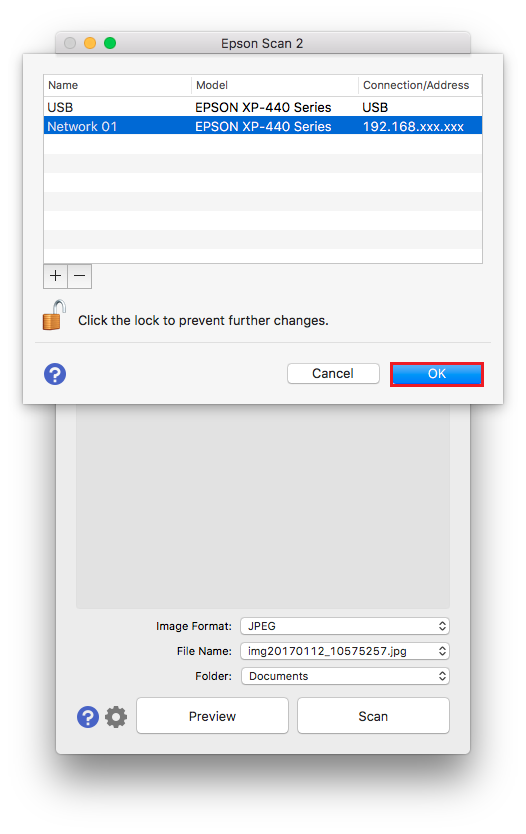
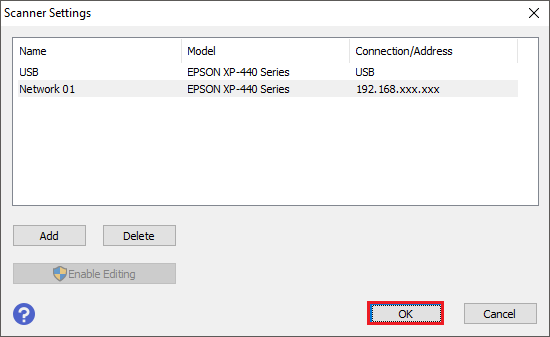
The scanner now appears as a selectable device in the Scanner drop-down box. Click OK to complete setup.
macOS
If You Have No Scanners Installed (macOS)
-
Open Epson Scan 2 — you'll see the blank startup screen shown below.
-
Click the padlock icon to enable the Add button.
-
Enter your Mac's username and password (your Mac login/admin credentials, not your Epson account), then click OK.

-
Click the Add button, then continue with "Add the Network Scanner (macOS)" below.

If You Already Have a Scanner Installed (macOS)
-
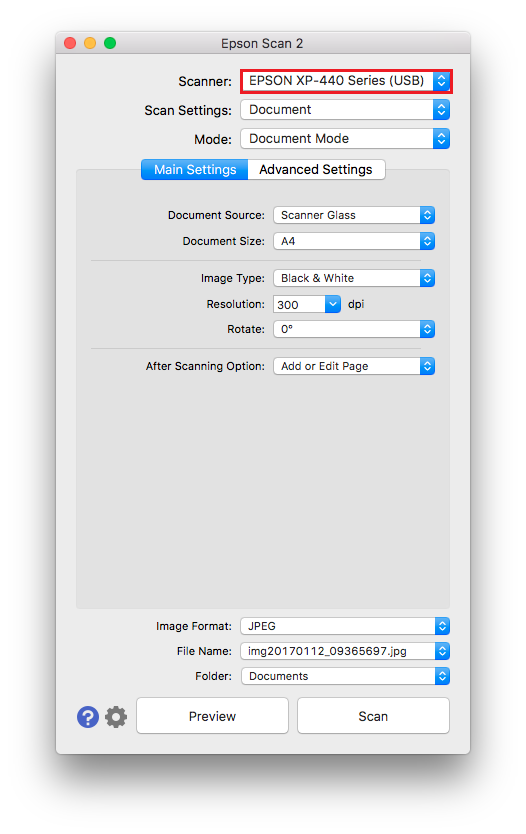
Click the Scanner drop-down menu.
-
Select Settings.
-
Click the padlock icon to enable the Add button.

-
Enter your Mac's username and password (your Mac login/admin credentials, not your Epson account), then click OK.
-
Click the Add button, then continue with "Add the Network Scanner (macOS)" below.
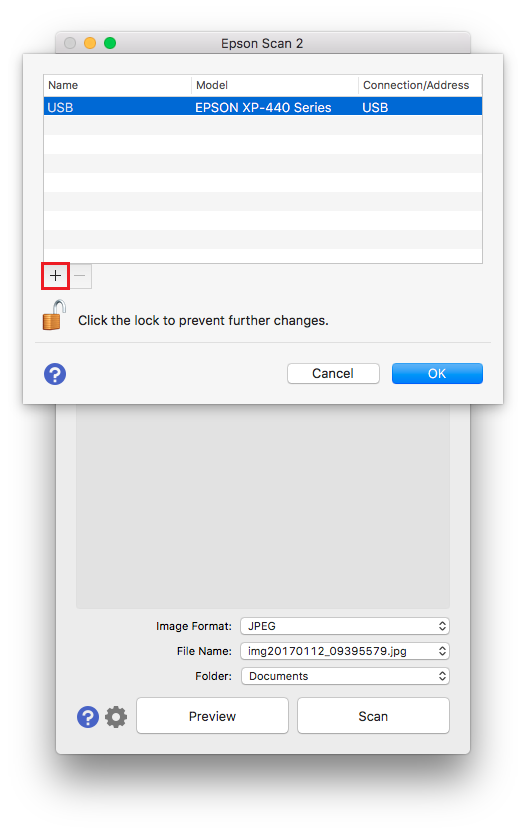
Add the Network Scanner (macOS)
-
Select the scanner you want to add from the Model list. Epson Scan 2 automatically starts searching your local network for the selected scanner.
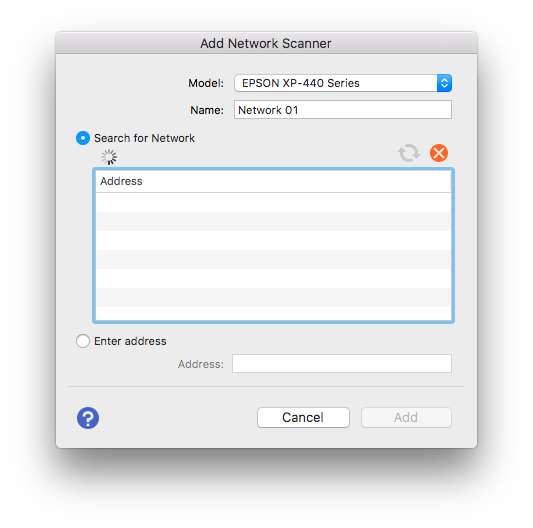
Note: You can rename the scanner by changing the text in the Name box.
-
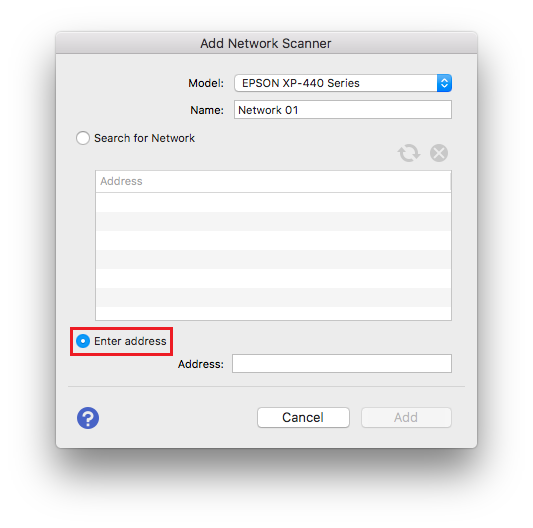
To add a scanner manually using its IP address instead, select Enter Address.
-
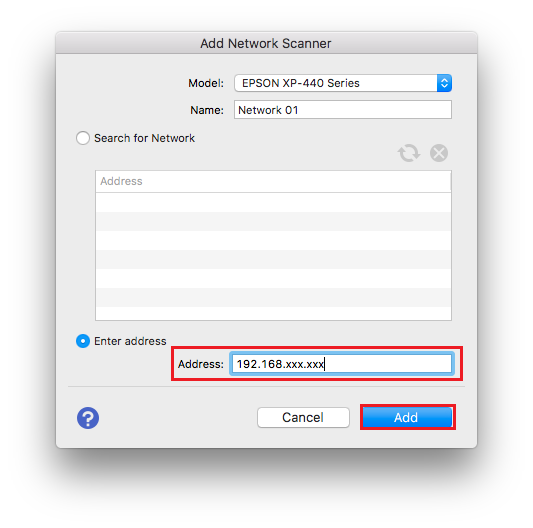
Type in the scanner's IP address, then click Add.
-
The scanner now appears as a selectable device in the Scanner drop-down box. Click OK to complete setup.