Epson Scan 2 Utility: Overview of Features and Settings
Applies To
- Hardware: Epson scanners and multifunction printers with the Epson Scan 2 Utility installed. Available tabs and settings vary by scanner model — the screenshots below show the Epson FF-680W as an example.
- Software: Epson Scan 2 Utility
-
Related Articles:
- KA-01828 (Epson Scan 2 Maintenance Utility — a separate, standalone tool found in the Epson Scan 2 program folder, not this driver-accessed one; covers software reset, diagnostic logging, and USB compatibility mode)
Description
The Epson Scan 2 Utility provides access to scanner information, maintenance options and device-specific settings. This article explains the purpose of each tab and setting available within the utility.
Note: Some items and settings may not be available, depending on the scanner being used. For the specific functions available on your model, refer to the product's User Guide.
Solution
Select a tab below to learn what each section of the Utility does.
Scanner
Select the scanner being used.

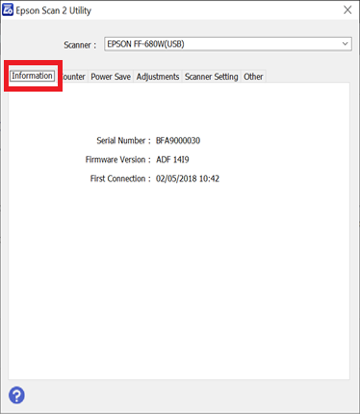
You can check information for the selected scanner, including:
- Serial Number
- Firmware Version
- First Connection
Counter
Check the total number of scanned originals and the status of consumable parts.
- Scan Counter — the total number of scanned sheets and the number of errors that have occurred.
- Consumable parts (e.g. Roller Assembly Kit, Pickup Roller, Separation Roller, Separation Pad — availability depends on scanner model): shows the Number of Scans on that part, its expected Life Cycle, and a Count Alert Setting you can adjust to control when a replacement reminder appears.
- Reset button — resets a consumable's scan counter after you've physically replaced it. Use this after fitting a new part, following the on-screen replacement instructions.
Note: Once a consumable's scan count passes its Life Cycle or Count Alert threshold, a replacement message appears the next time Epson Scan 2 starts. Continuing to use worn consumables past this point can cause multiple originals to feed at once, or paper jam errors.

Power Save
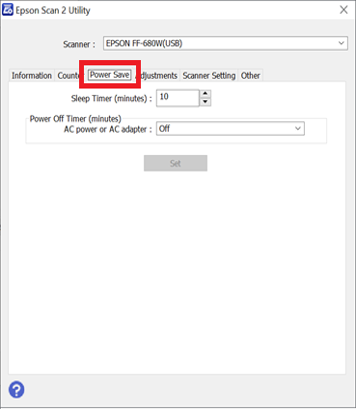
Configure how the scanner behaves when left idle.
- Sleep Timer (minutes) — how long the scanner sits idle before entering sleep mode.
- Power Off Timer (minutes) — how long before the scanner automatically turns off. Set to Off to disable automatic power-off.
- Power Off If Disconnected — turns the scanner off roughly 30 minutes after all ports, including USB, are disconnected.
- Direct Power On — turns the scanner on automatically as soon as it's connected to power, without needing the power button pressed.
Note: These settings aren't available when the scanner is connected over a network rather than directly.
Adjustments
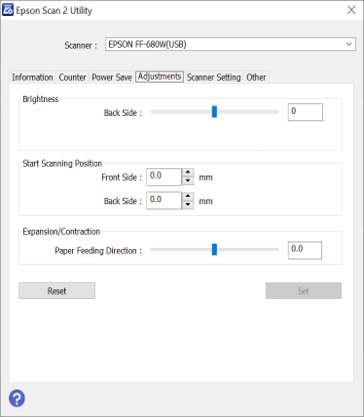
On the Adjustments tab, you can adjust the brightness of the image you want to scan, the starting position for scanning, and similar settings.
Note: The exact options on this tab vary significantly by scanner model. Consult your product's User Guide for the specific settings available.

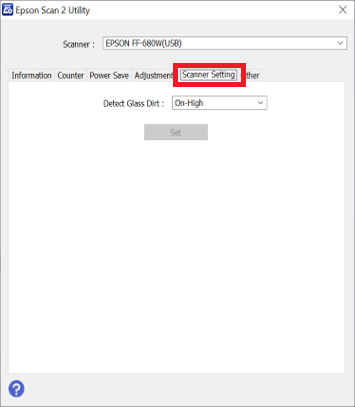
Scanner Setting
Change scanner-specific settings available for your product.
- Detect Glass Dirt — detects dirt on the scanner's internal glass surface. Choose On-Low or On-High for the detection sensitivity.
- Paper Protection — stops scanning immediately if a feeding error occurs or an original is fed askew, to reduce the risk of damage. On-Low, On-Medium, and On-High trade off between missed detections (too low) and false positives from things like stapled or irregularly shaped originals (too high).
- Double Feed Stop Timing — Immediate stops feeding as soon as a double feed is detected; After Eject finishes ejecting the affected originals as scanned, then pauses before continuing, letting you resume if the scanned image turns out fine.
Other
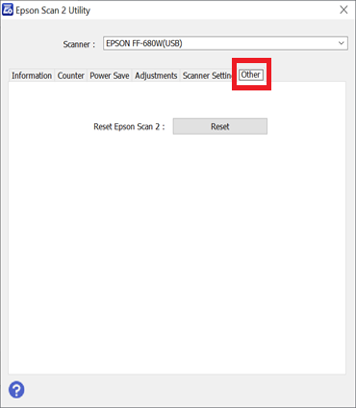
Use the Reset option here to initialise all Epson Scan 2 settings, except for network scanner settings, back to their defaults.